Who does not want to have the flexibility and refined grace? But many are stopped by the thought that at 30, 40, or 50 it may be too late to start working on stretching. Actually, it is not. At any age and with any initial data, you can learn to sit on the twine.
Twine preparation
The first question that worries most girls: can I? Of course, you can! If you do not have medical contraindications, for example, the consequences of fractures, cardiovascular diseases, spinal injuries, or joint problems. The main thing is to exercise regularly and not take long breaks in training. Otherwise, it may happen that the preparation will have to start from scratch. Of course, you can take a short break during the holidays or vacation, but only if for a short period of time.
The duration of the preparation for the twine can be different – we will not convince you that in a couple of months, you will sit confidently in it. We are all different, and therefore the speed of progress is individual for each. But practice shows that those who have previously been involved in any kind of sport or sat on a twine achieve their goal faster. Age also affects muscle elasticity, but even at 50, you can easily cope with the task.
Someone stubbornly goes to their goal for six months or even a whole year, while others have enough for 3-6 weeks. It is important to be patient, persistent, and not give up, even if at some point you feel a regression, this also happens sometimes.
Warm-up Exercises
If you haven’t exercised before, start with 2-3 times a week and watch how you feel. And if you have a prepared body, training can be done every day. If possible, it is better to divide the lesson into two times a day for half an hour than to study once for an hour.
In order to achieve good results, in addition to stretching, it is necessary to perform weekly functional training. Muscles that are in good shape are less injured and better stretched.
Will it hurt? Yes, it will. After all, if you perform the exercises exactly until the moment when discomfort begins, there will be no effect from them. But you need to understand the difference between natural pain during stretching and sharp pain on the verge of injury. During classes, you will definitely leave your comfort zone, but it will not be sharp, but rather pleasantly pulling pain sensations.
For training, you can use sports equipment:
- Rug;
- Fitness elastic bands or yoga straps;
- Cubes-blocks for stretching (can be replaced with books);
- Pillows;
- Dumbbells or 0.5-liter water bottles.
A basic set of exercises:
- Knee extension
Sitting on the floor, bend your right leg at the knee and grab the foot or lower leg with your hands. The left leg remains straight. Gradually straighten your right leg. You should feel tension in the back of your thigh. Repeat the exercise with the left leg extension.
- Lunges
Starting position – kneeling. With your right foot, take a wide step forward: the heel should be exactly under the knee, and the left leg rests on the knee. Now you need to lower the pelvis as low as possible to the floor. Tension should be felt in the front of the left leg and the back of the thigh of the right leg. Repeat the lunge on the left leg.
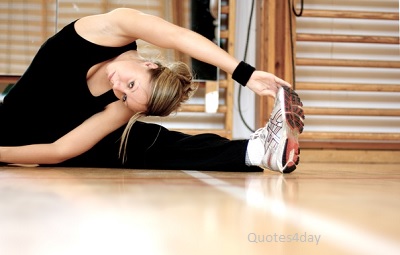
- Fold
Starting position – sitting on the floor with legs extended and a flat back. Perform forward bends, feeling the tension in the back of the thighs. The exercise can be performed in a standing position.
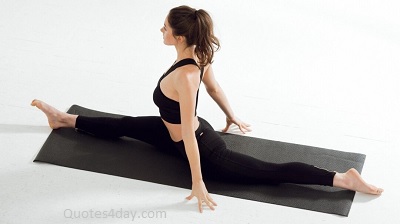
- Leg-split
If your goal is to sit on the twine, the position of the twine should become a mandatory element of the stretch. Let’s start with the development of the longitudinal. Unlike the transverse split, in which the load falls on the ligaments of both legs, with the longitudinal twine, only the leading leg is stretched. Therefore, first, we master the longitudinal twine on the right and left legs, and then we move on to the transverse one.
Interesting on the topic 10 Effective Easy Exercises for Stomach and Side Fat
Stand on your left knee, and bring your right leg forward so that the left knee comes off the floor and “looks” down. In this case, the pelvis remains in a neutral position. We try to go down and fix the position.
Stretch rules
The very first rule is not to stretch without warming up. It can be a light cardio load or joint gymnastics:
- Head turns left and right.
- Shoulder movements back and forth in a circle.
- Rotations of straight arms forward and backward.
- Circular movements of the forearms (with arms bent at the elbows).
- The body tilts with rotation.
- Pelvic rotation.
- Circular movements of the hips.
- Rotations of the knees, feet, and hands.
A few more rules:
- Choose a static stretch and avoid sudden movements that can lead to injury.
- Try to relax as much as possible, otherwise tense muscles will only interfere.
- Each static exercise must be performed for at least 20-30 seconds, gradually increasing the load to 1-2 minutes.
- In the process of training, follow the internal sensations in the body: a slight and pleasant pulling pain should be felt. Any sharp sensations signal an incorrect body position and the risk of injury.
- When exercising, remember to keep your back straight.
- Remember about breathing: at the beginning of the exercise – a deep breath, during stretching – a slow exhalation to reach the limit.
And most importantly: each lesson should bring you satisfaction, and not be perceived as a difficult test. After training, be sure to praise yourself for taking another step towards splits and a flexible body.
FAQs
How long does it take to achieve the twine position?
The time required to achieve the twine position varies from person to person. It depends on factors such as your current flexibility, dedication to regular practice, and individual body characteristics. It’s important to set realistic goals and be patient with your progress.
Can anyone achieve the twine position, regardless of age or body type?
Yes, with consistent effort and proper training, most individuals can improve their flexibility and work towards achieving the twine position. Age and body type may affect the rate of progress, but it’s possible to make significant improvements regardless of these factors.
Are there any specific dietary recommendations to improve flexibility?
While there are no specific dietary recommendations solely for improving flexibility, maintaining a well-balanced diet that includes a variety of nutrients is beneficial for overall health and muscle function. Eating a diet rich in fruits, vegetables, lean proteins, and healthy fats can support muscle recovery and overall flexibility.
Can stretching exercises help with back pain?
Yes, stretching exercises can be beneficial for alleviating back pain. Gentle stretches that target the lower back, hip flexors, and hamstrings can help reduce muscle tension and improve flexibility, which may relieve back pain. However, it’s important to consult with a healthcare professional to determine the specific stretches that are suitable for your condition.
Is it necessary to warm up before every stretching session?
Yes, warming up before stretching is crucial to prepare your body for the exercises. A proper warm-up increases blood flow raises body temperature, and primes your muscles for stretching. Engaging in light cardiovascular exercises, such as brisk walking or jogging, for a few minutes can effectively warm up your body before stretching.